
How to make jam at home: timing, quantities and mistakes to avoid
Making jam at home is one of those things that seem complicated but really only ask for a little care and the right proportions. In Cilento we have always done it: when the fruit is at just the right ripeness, we turn it into jam so as not to waste a single piece and to find its scent again even in January, on our breakfast bread. In this guide you'll find everything that really matters: what to get, the rule for measuring the sugar, the step-by-step method and the most common mistakes to avoid.
 |
From our range
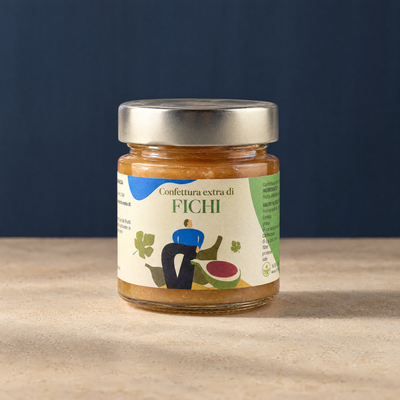
Confettura di FichiArtisan-made, without preservatives.
€ 7,90
Discover →
|
What you really need to make jam
Even before the fruit, the basic equipment matters. You don't need expensive tools: a few of the right ones are enough, and the difference is between a relaxed afternoon and a kitchen in chaos.
- A wide, thick-bottomed pot, ideally steel: the large surface helps the water evaporate quickly.
- A long wooden spoon and a skimmer to remove the foam during cooking.
- A kitchen scale: the proportions must be respected to the gram, guessing doesn't work.
- Glass jars with new airtight lids, washed and sterilised.
- A saucer kept in the freezer for the gelling test.
- Optional: the juice of half a lemon, which helps preservation and setting.
The proportions: the basic rule
The classic rule of farming tradition is simple: 700 g of sugar for every 1,000 g of cleaned fruit. It is the amount that ensures long preservation, from 12 to 24 months, and natural gelling without the need for thickeners.
Two precautions make the difference. First: the weight to consider is that of the already cleaned fruit, peeled and with cores and stones removed, not the starting one. Second: if the fruit is very ripe and sweet you can go a little lower, but below 600 g of sugar per kilo the jam keeps less well and must be stored in the fridge. If you prefer it less sweet, it's better to use a smaller portion on your bread than to cut back too much on the sugar in the jar.
The step-by-step method
1. Preparing the fruit
Wash the fruit well and remove any bruised or worm-eaten pieces: a single spoiled one can change the flavour of the whole batch. Peel where needed — apples, pears, peaches — while strawberries, figs and blackberries just need cleaning. Cut into even pieces of about 2-3 cm, so the cooking stays uniform. Then weigh the cleaned fruit: this is the weight that counts for calculating the sugar, not the initial one.
2. Maceration (optional but recommended)
Put the cut fruit in a bowl, cover it with sugar and let it macerate in the fridge for 2 to 12 hours, even overnight. The sugar draws the water out of the fruit and forms a syrup: this way the cooking time is shorter and the jam keeps brighter colour and aroma. It's a step easily skipped when you're in a hurry, but if you have time it really makes a difference.
3. Cooking
Pour the fruit and syrup into the wide pot and bring to the boil over medium-high heat, stirring often so it doesn't stick to the bottom. Once it comes to a rolling boil, lower the flame slightly and carry on: depending on the fruit and the quantity it takes 30 to 45 minutes. Skim off the foam that rises to the surface and, if you like, add the lemon juice about halfway through cooking. The jam is almost ready when it turns glossy and the foam stops forming.
4. The saucer test
It's the most reliable way to tell whether the jam is ready. Pour a teaspoonful of it onto a saucer kept in the freezer, wait 30 seconds and tilt it: if the drop runs slowly or stays still, you can turn off the heat. If it still runs watery, carry on for a few minutes and repeat the test. Remember that as it cools the jam thickens further, so don't overdo it or you risk a rubbery result.
When it's ready, pour the still-boiling jam into the sterilised jars, filling them almost to the brim, close them immediately and turn them upside down for a few minutes: a vacuum forms and you hear the classic "click" of the lid pulling down. Store the jars in the dark and, once opened, keep them in the fridge.
Mistakes to avoid
- Weighing the fruit before cleaning it: it distorts the sugar calculation and the preservation.
- Using a pot that's too small or narrow: the water struggles to evaporate, the cooking drags on and the aroma fades.
- Not stirring enough: the jam sticks to the bottom and takes on a burnt taste.
- Filling the jars cold or skipping sterilisation: it's the most common cause of mould and jars that don't hold the vacuum.
- Cooking too long: beyond a certain point the colour darkens and the texture turns rubbery.
- Cutting the sugar too much thinking it makes the jam healthier: below a certain threshold it has to be treated like a fresh product for the fridge.
With a little practice you'll find your own balance between fruit and sugar and learn to recognise the right moment by eye. And if you want to taste how we work the fruit of our land — from the white figs of Cilento to seasonal jams — you'll find our artisan workshop just below.
From our workshop in Cilento
Kit Benvenuto — 6 vasetti artigianali
The selection to get to know us: 6 sweet and savoury jars, 2 award-winning (Great Taste 2025 and WineHunter Gold). Free shipping included.
Discover → 29,70 €Free shipping in Italy from 27€ · 4.9★ on Google